以下為電子實習的Final report
Final report
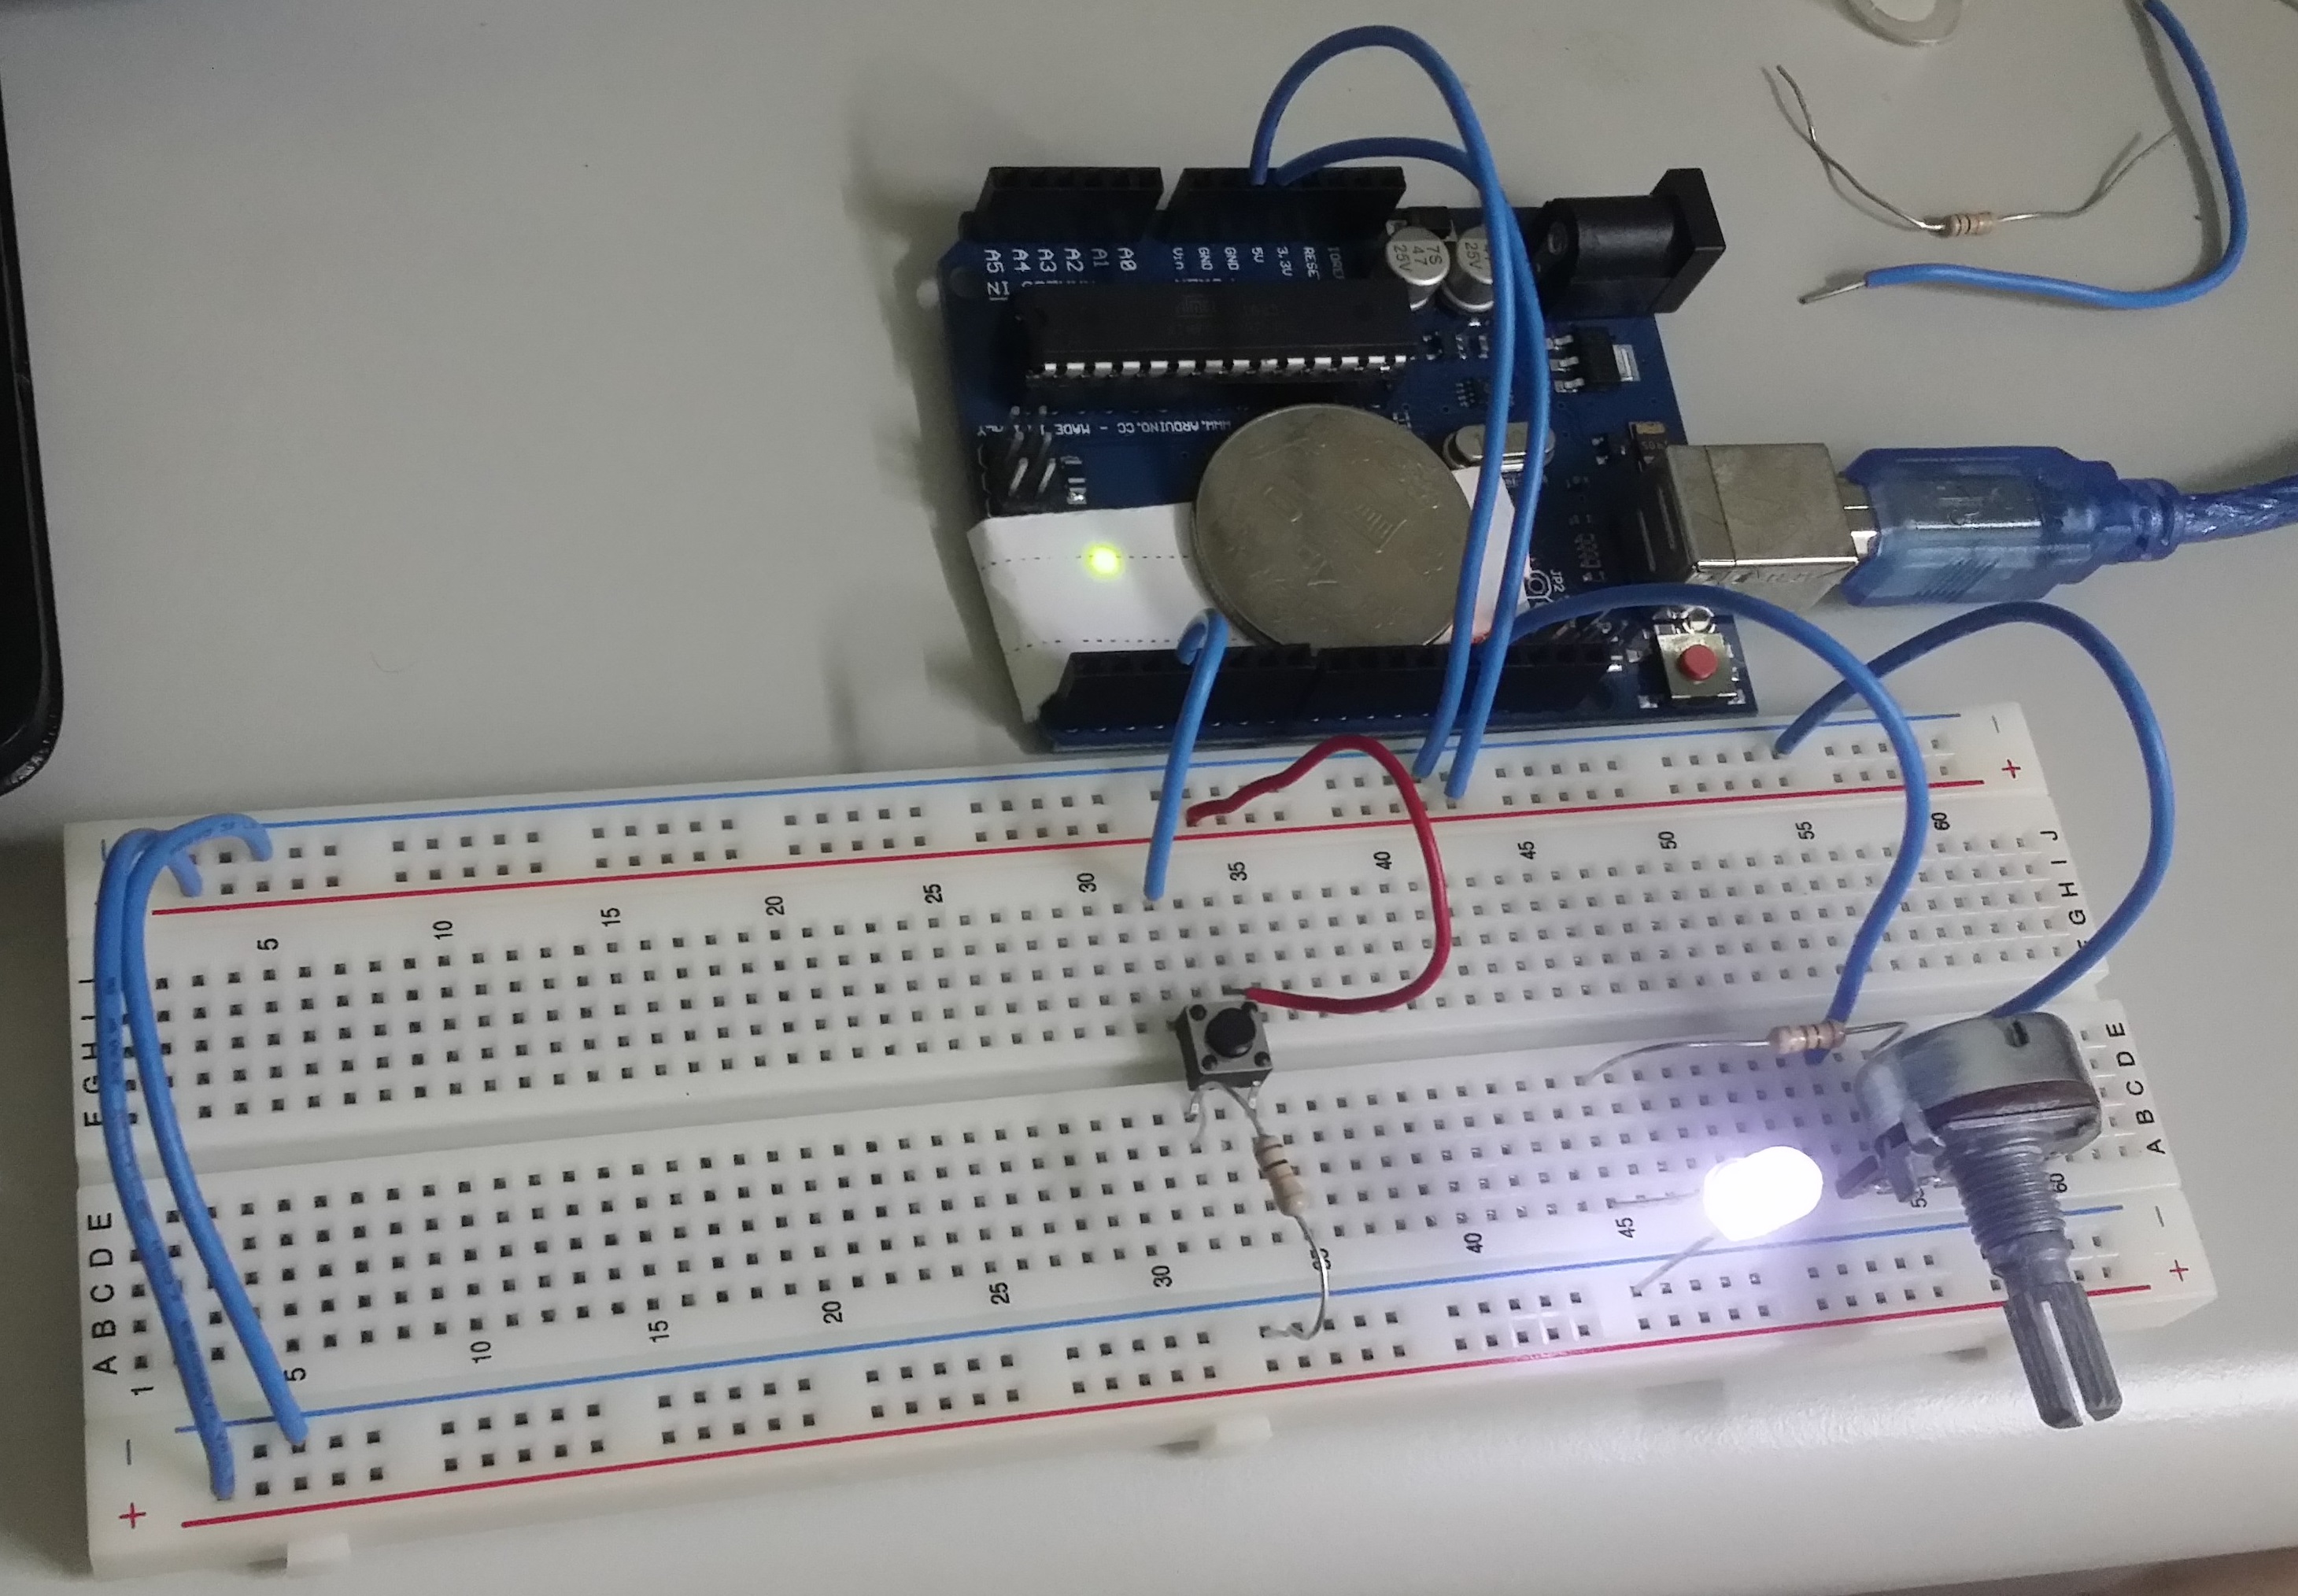
需要材料:
Wire: n個
Button: 一個
220Ω Resistor: 一個
10kΩ Resistor: 一個
500Ω Potentiometer: 一個(不限電駔大小)
LED: 一個
Arduino Uno: 一個
Breadboard: 一個
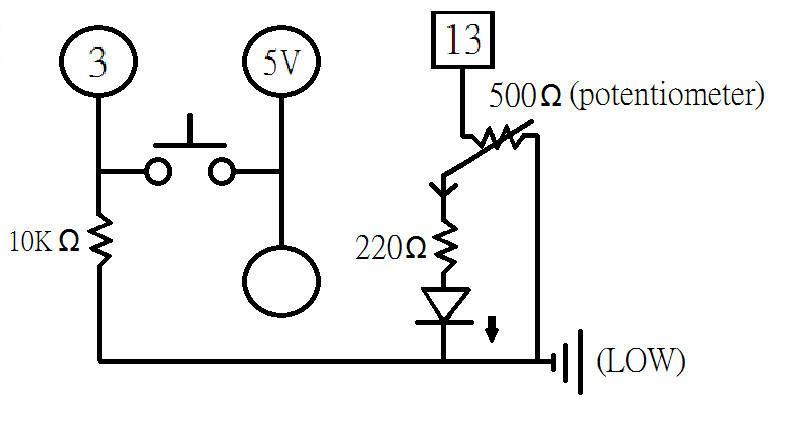
電路圖(Circuit diagram)
程式碼(Code)
int ledPin = 13;
volatile int state = LOW;

void setup() {
  pinMode(ledPin, OUTPUT);
  attachInterrupt(1, blink, RISING);
}

void blink()
{
  state = !state; // LOW轉成HIGH 或 HIGH轉成LOW
}

void loop() {
  digitalWrite(ledPin, state);
  delay(50);
}

/* 程式解說
Pin13為開啟LED的腳位
state為HIGH 或 LOW,以attachlnterrupt控制帶入void blink公式
每當Pin3的電壓上升時,將會啟動void blink公式,而啟動Pin3為HIGH或LOW
*/
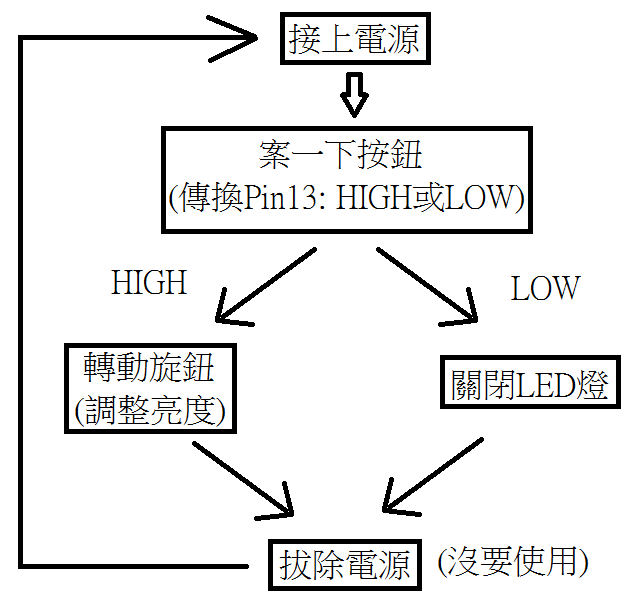
流程圖
影片(Video)
Final report from 40423222 on Vimeo.
使用容器
點擊圖片連結

參考網站:
產品影片: https://www.youtube.com/watch?v=FsFbzvJpeMo
參考對象:

產品網站: https://www.pinkoi.com/product/1z4BOWzK?gclid=CM652u-CrdQCFRIKKgodqXIBsA
參考對象:
